Beginners' Guide to Tango Elegoo Edition | VoxelDance Tango
In this tutorial, we are going to show you how to activate with printer device code and how to use Tango elegoo edition.
1. How to activate
Launch Tango and Click "Activate Your License"

Click "Activate"

Punch in the printer device code and fill in the personal info, click next, then register successfully

2. Printer and resin settings
After launching Tango, click Platform Definitions to set up printer and resin
Click on the plus icon, choose the printer you want
Click Add Machine, the printer profile is all set

Then choose the resin tab,choose from our built in resin profiles,
or you can add custom script,
3. Model editing
First, let's import the model
Choose and Open File to get started

4. Scale
Choose Scale from the menu
type in the size you want and click on Apply

5. Hollow
Choose the part you want to hollow, click on Modify,
Hollow

Click ok to Apply

You can check the result by dragging the slider up or down
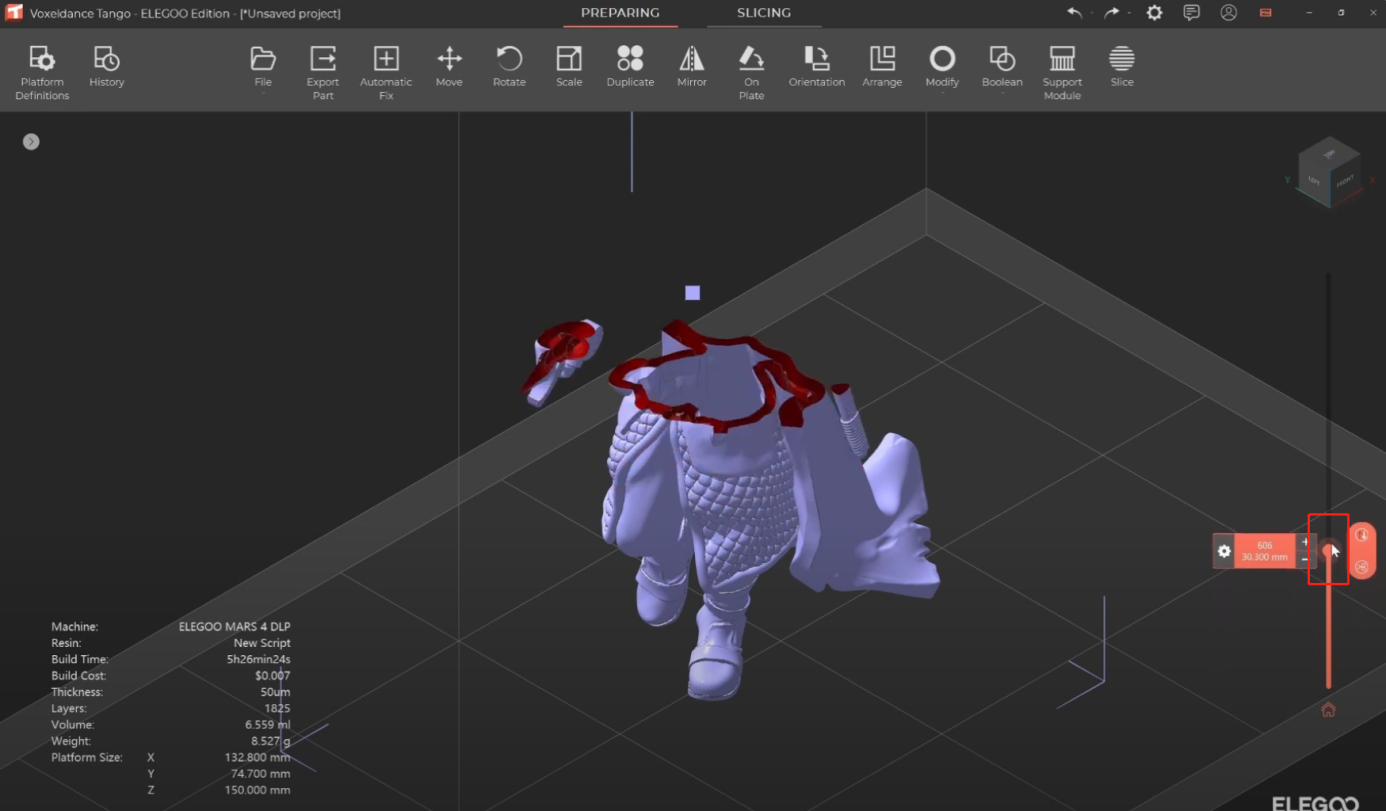
6. Add holes
Select Modify, Hole
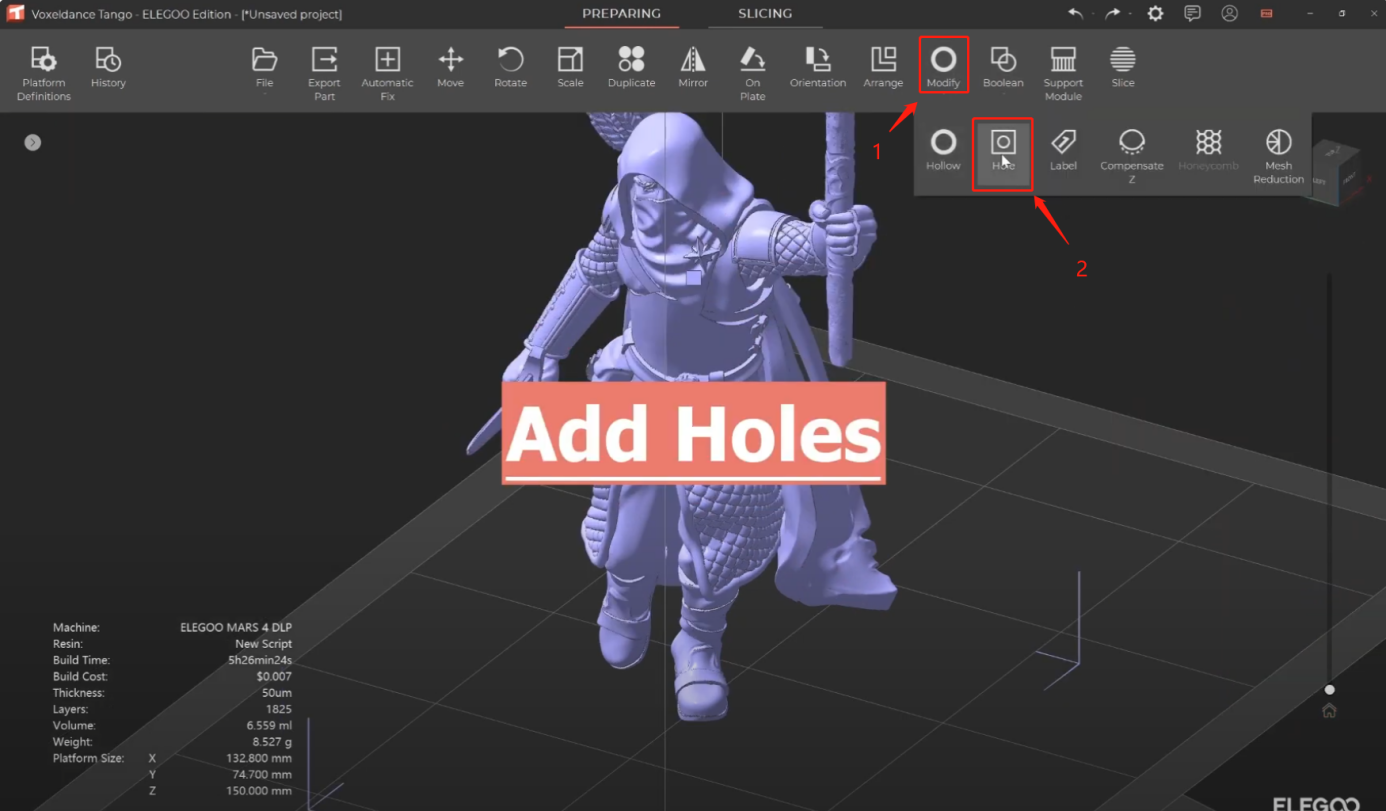
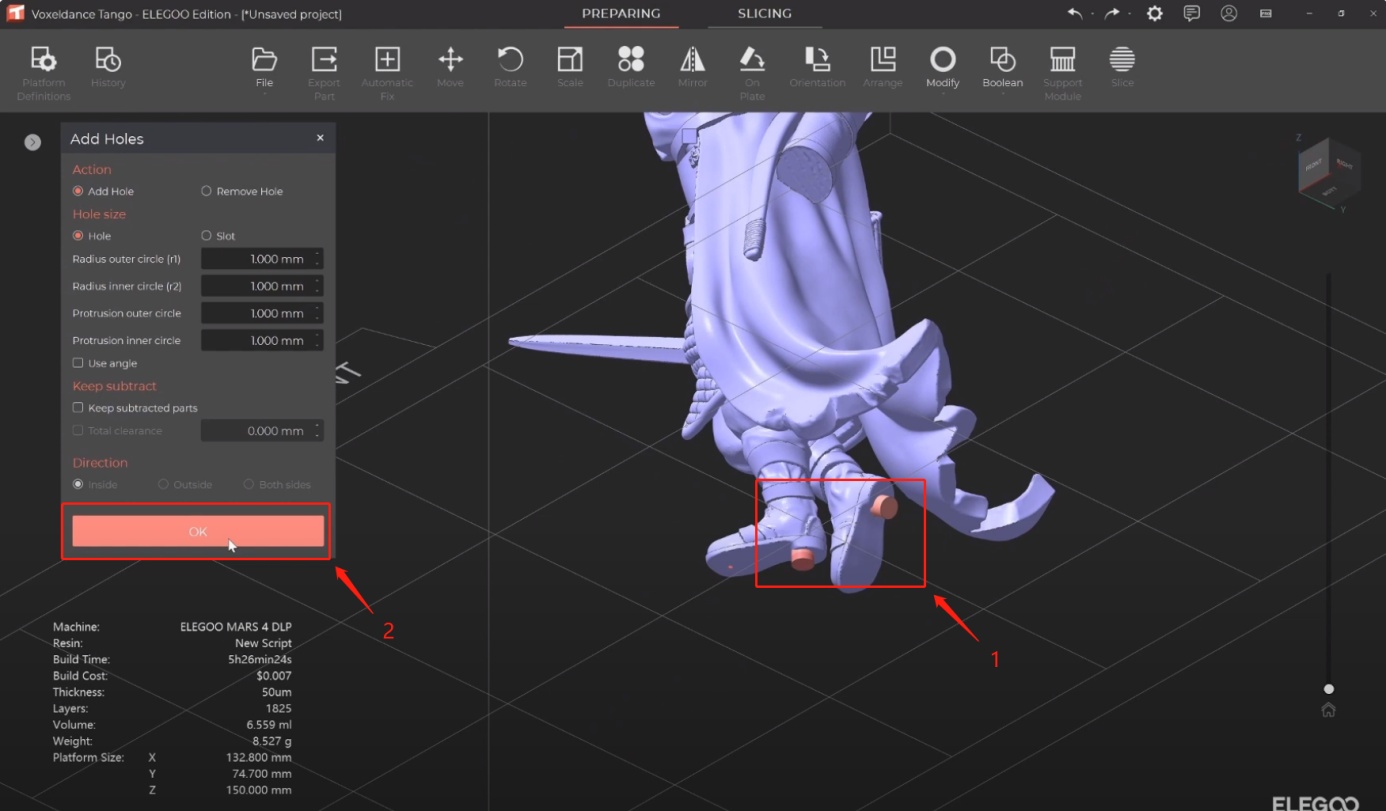
Then click on the models to add holes
Hit on OK to apply the changes
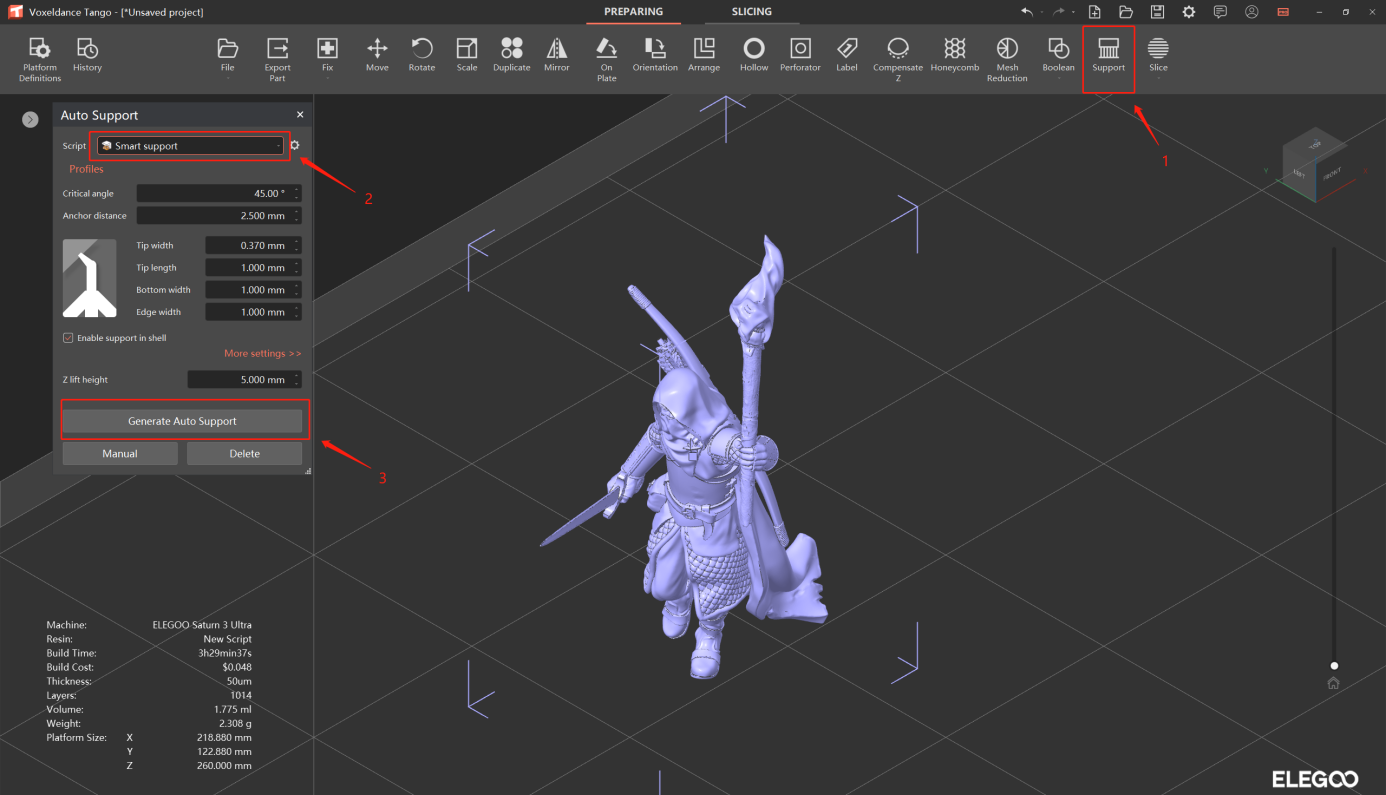
7. Support generation (updated to the v4.0)
Click on Support
Choose the script
Then Generate Auto Support
8. Slices export
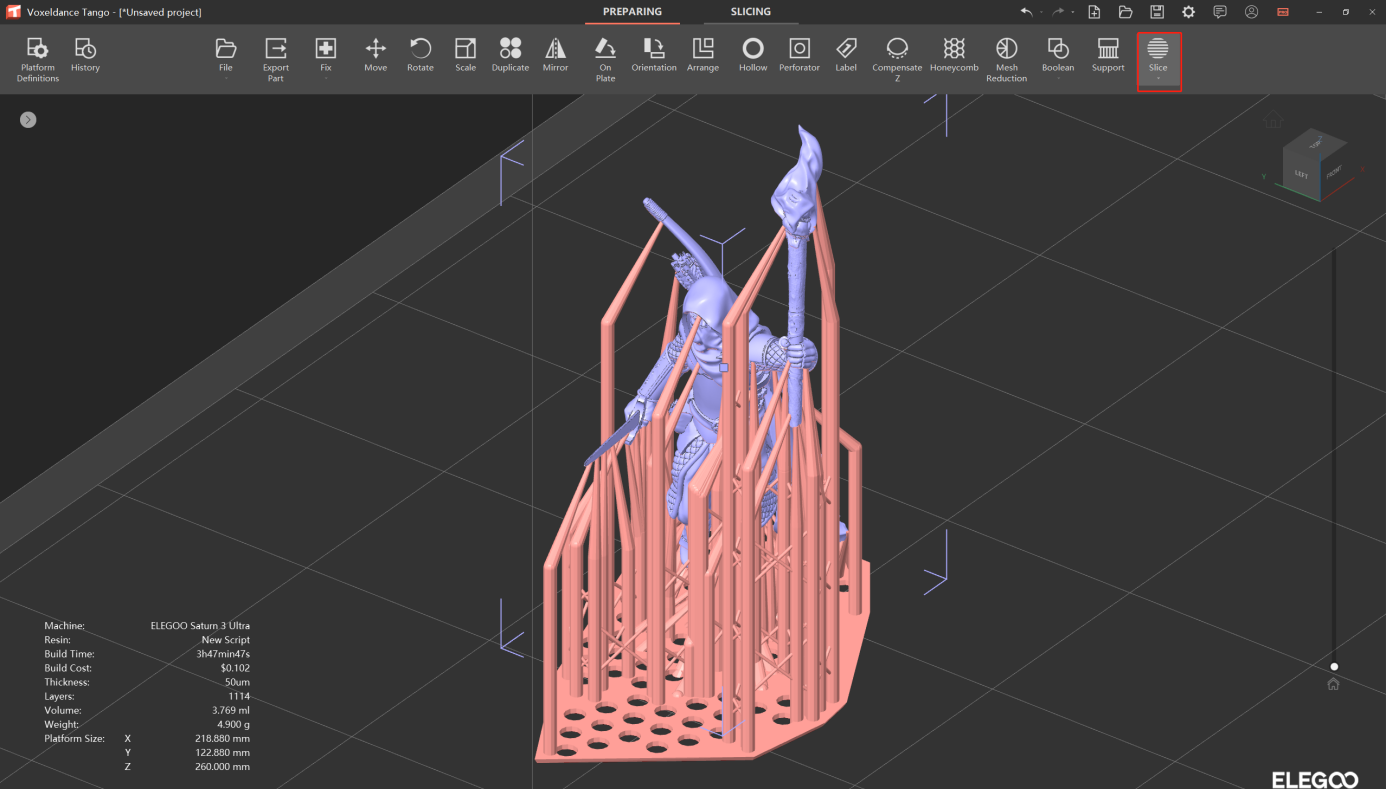
Click on Slice, tango will start to slice
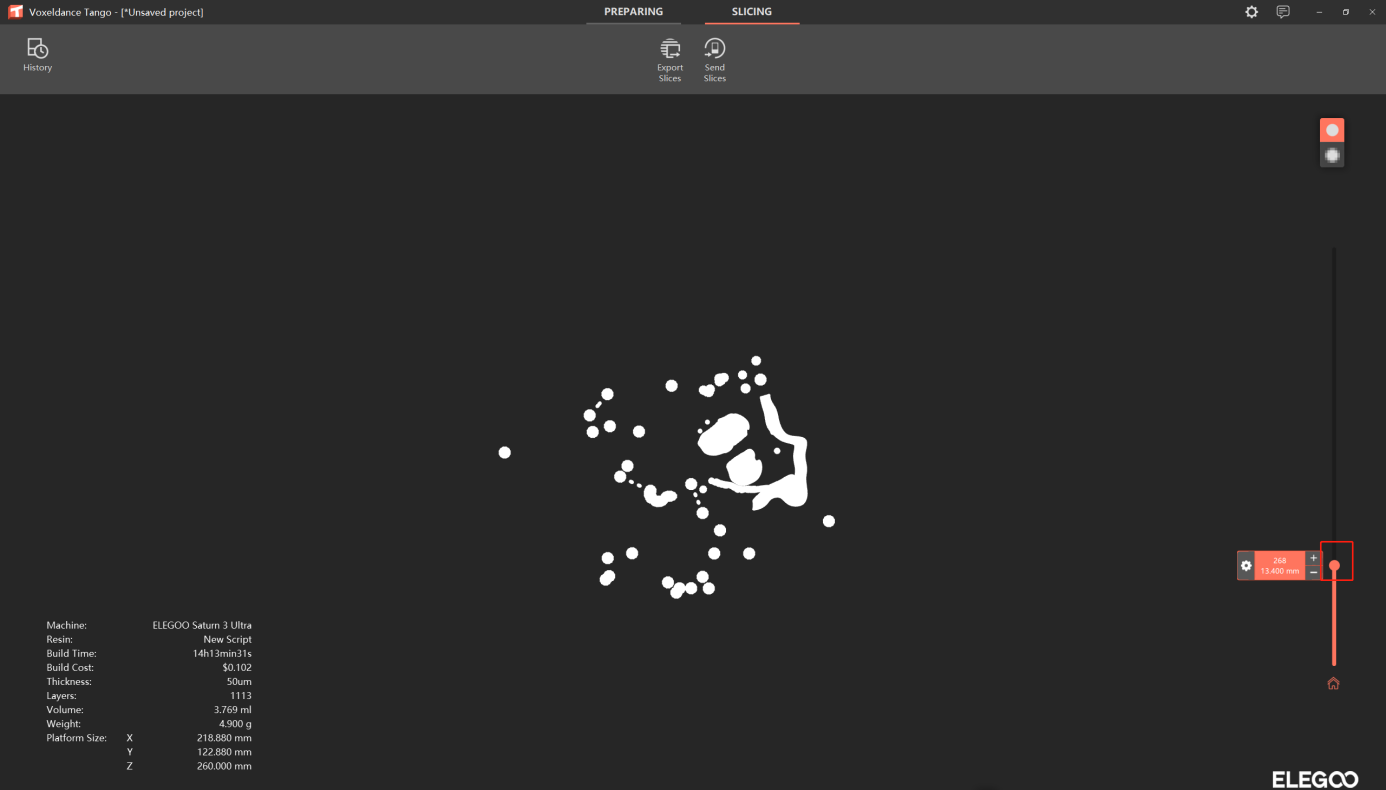
You can drag the slider to check the slices layer by layer
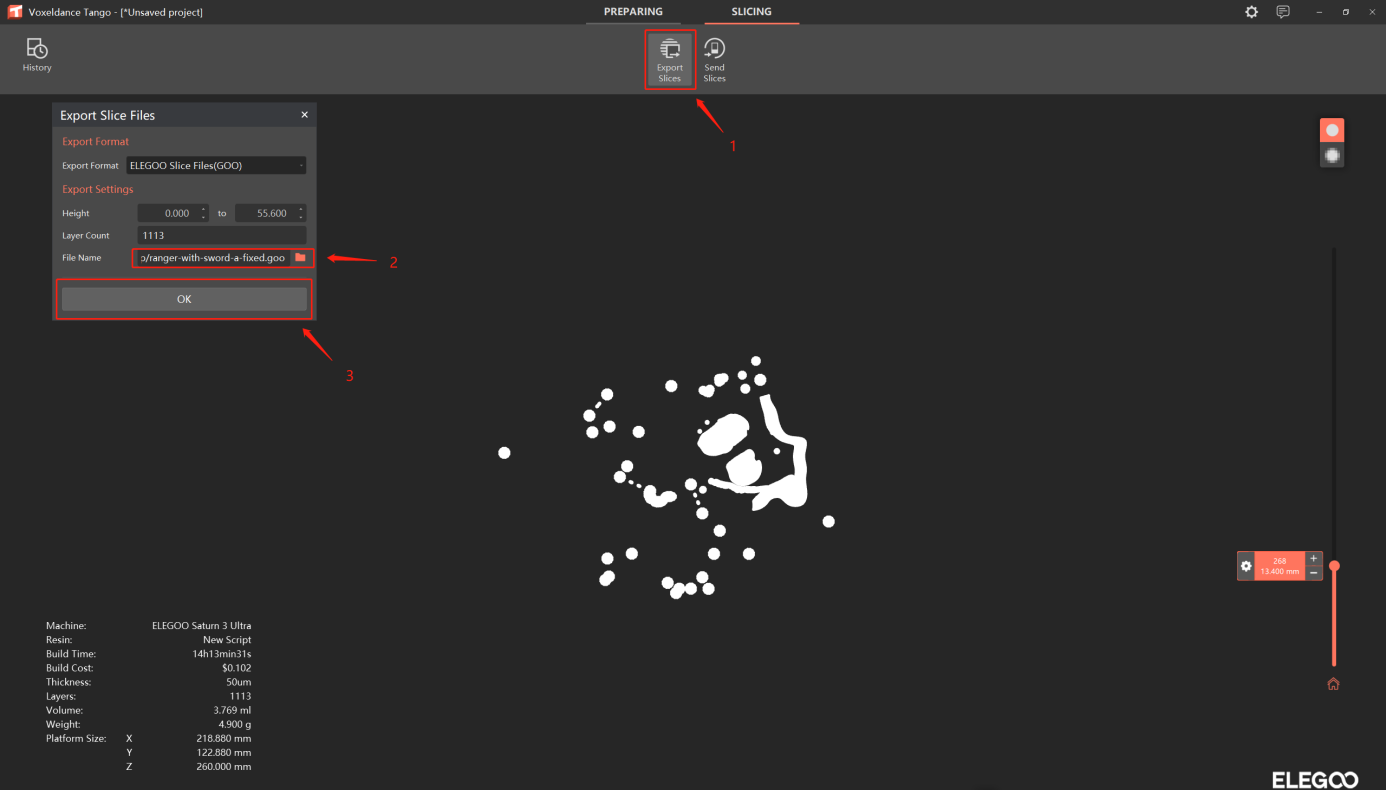
Click Export Slices, edit the file name and choose where to save the file, click ok and wait till the export finishes
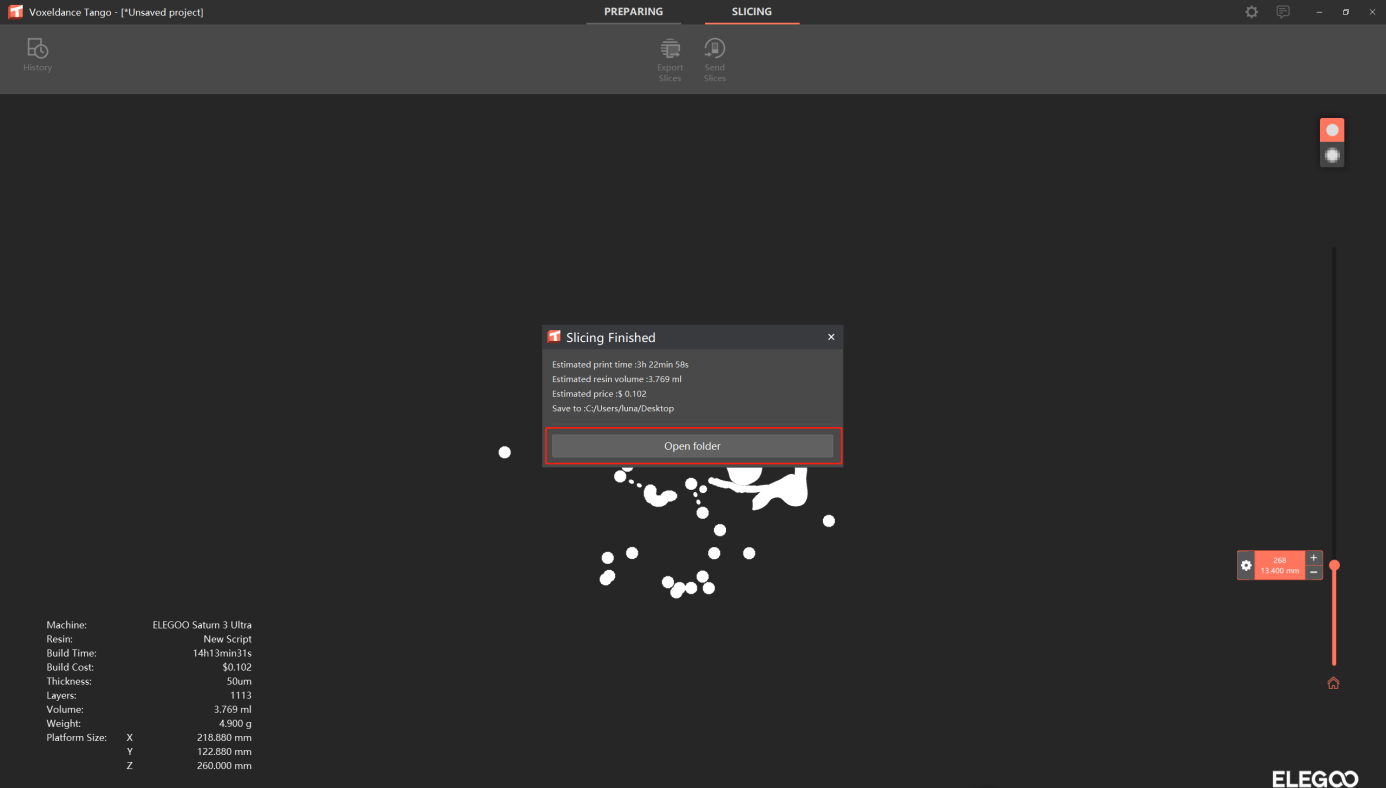
After slicing, open folder to check the saved file
Learn more about Tango slicer: www.voxeldance.com/Tango


