
Advanced Guide to prepare complicated models in Tango Slicer for your 3D printing
In this video, we're going to show you how to prepare a complicated model like this in VoxelDance Tango slicer.
The steps are:
1) Printer and resin profile settings
2) Model editing (Scale, Model Split & Merge, Repair, Move, Orientation)
3) Support and hollow (Automatic support generation, Manual support editing, Hollow, Add holes)
4) Slicing and export
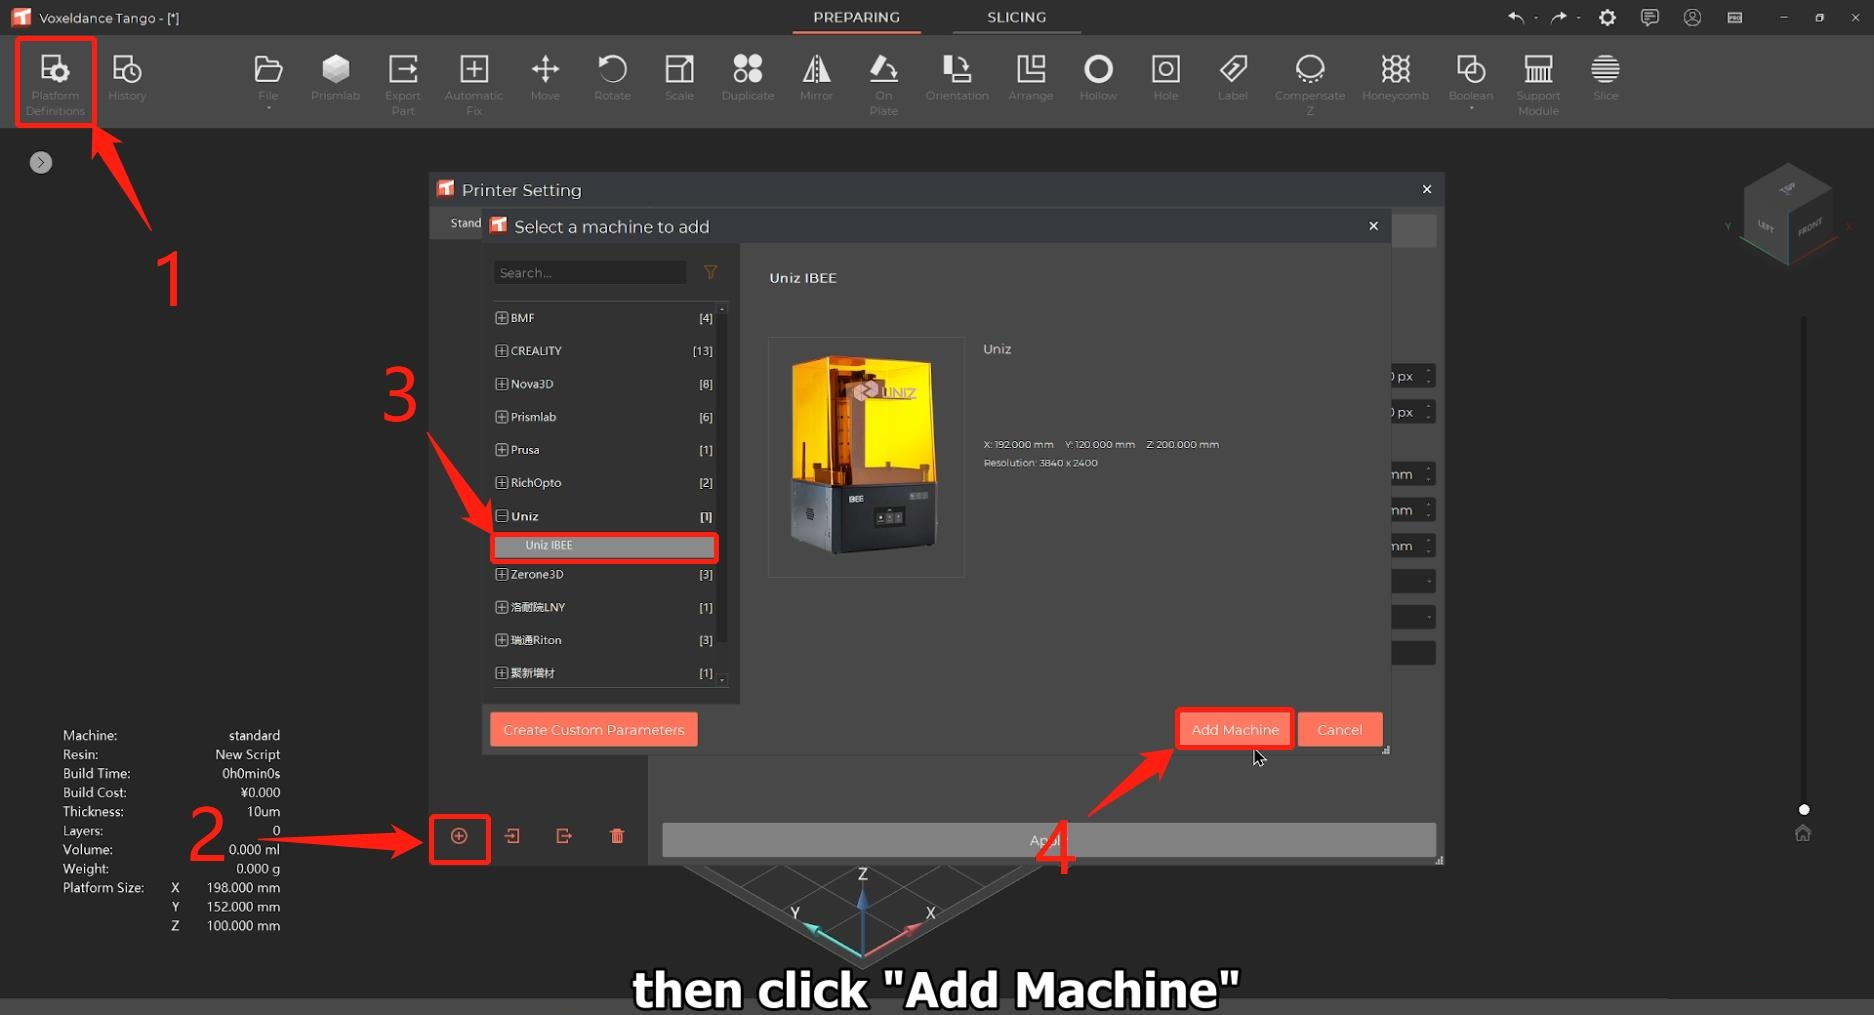
1. Printer and resin profile settings
Click on "Platform Definitions" at the up-left corner.
Click on the + icon , choose your printer model, then click "add machine". The printer profile is all set.
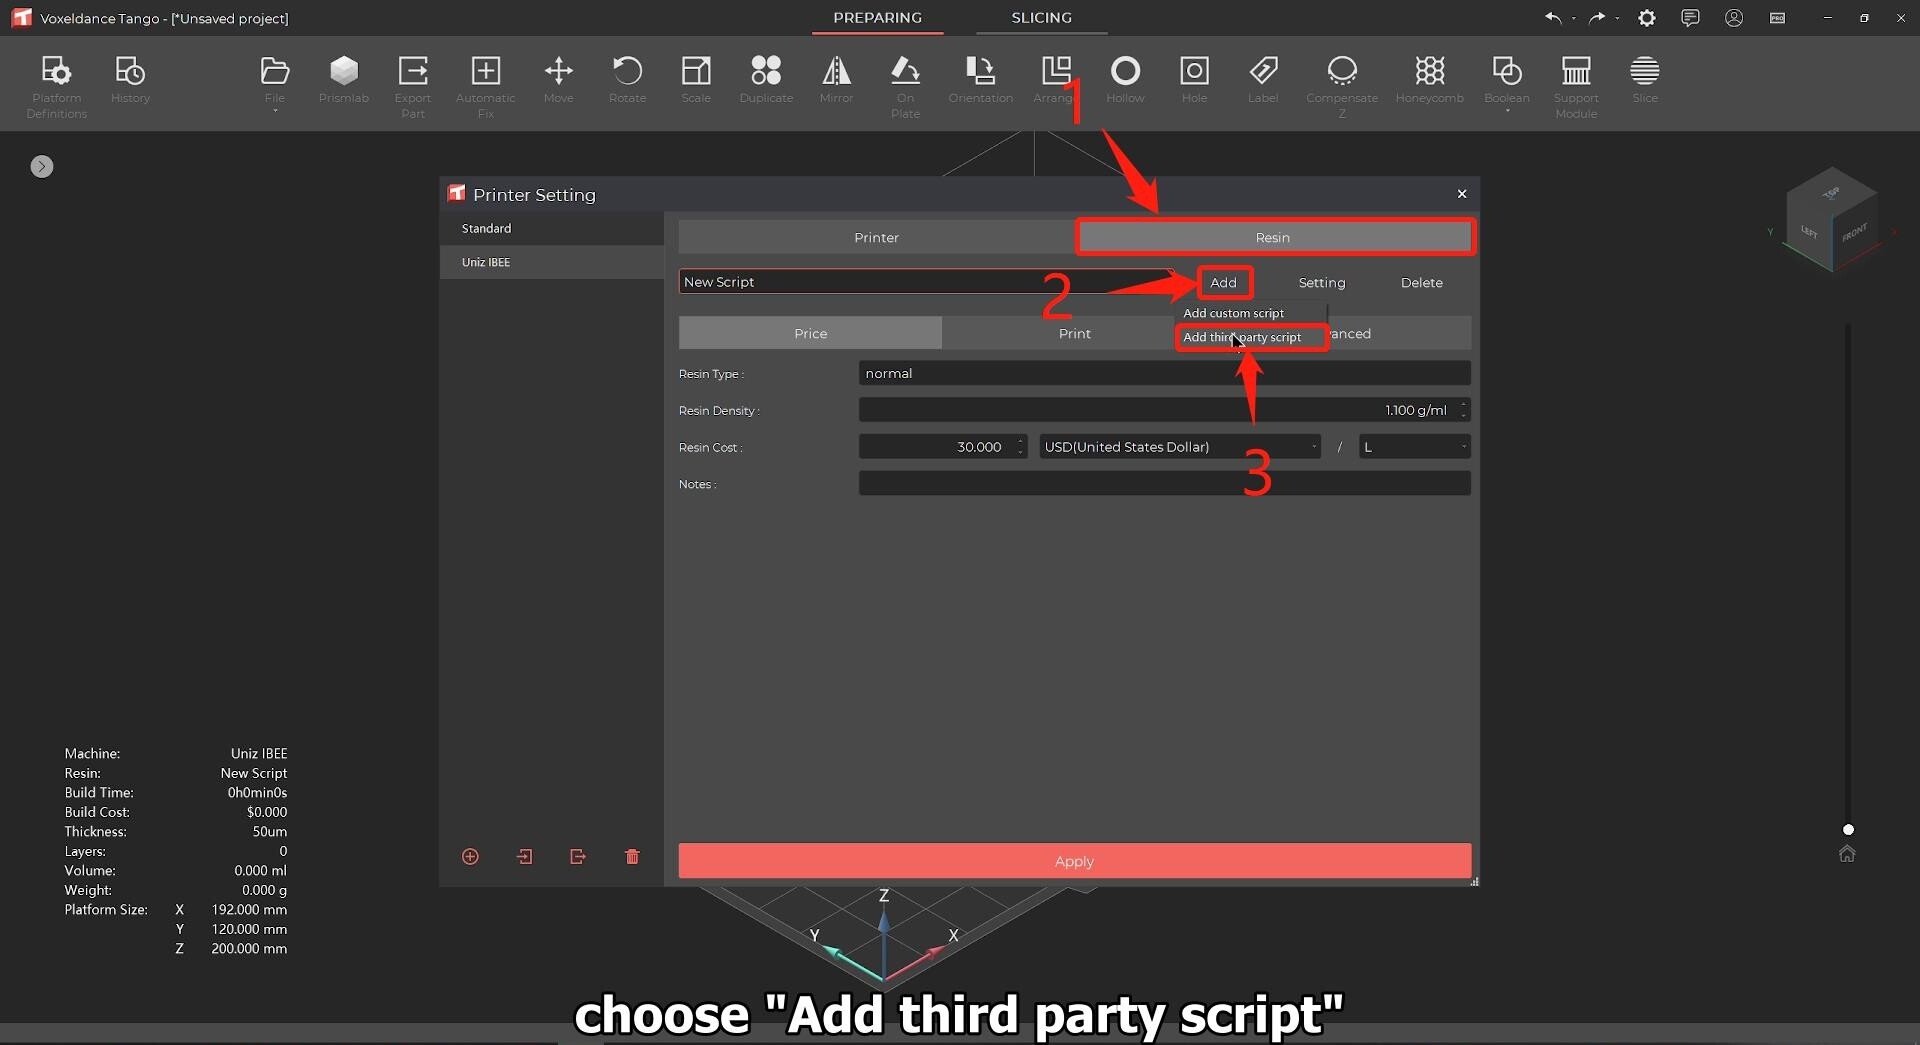
Then choose the resin tab, you can add custom script or choose from our built-in resin profiles.
To use a built-in resin profile, choose "add third party script", select the resin you use from the list, change print settings and anti-aliasing, grey, blur settings to suit your needs.
After that, click on "Apply" and close the window.
2. Model editing
First, let's import the model. Choose File, open File, and select the model you want to prepare.
After file import, Tango slicer will notify you of the model damage and error, you can ignore them for now.
Scale
Choose Scale from the menu, type in the size you want, and click on
Apply.
Model Split & Merge (Advanced
feature)
For this model, we can divide it into 3 parts (the person, the wolf, and the base) for a
better printing result.
Click on Boolean, Shells to Parts, to split the model.
From the Part Manager, we see the person, the base, and many other parts of the wolf.
Select all the wolf parts, click on Boolean, Merge parts to combine them together.
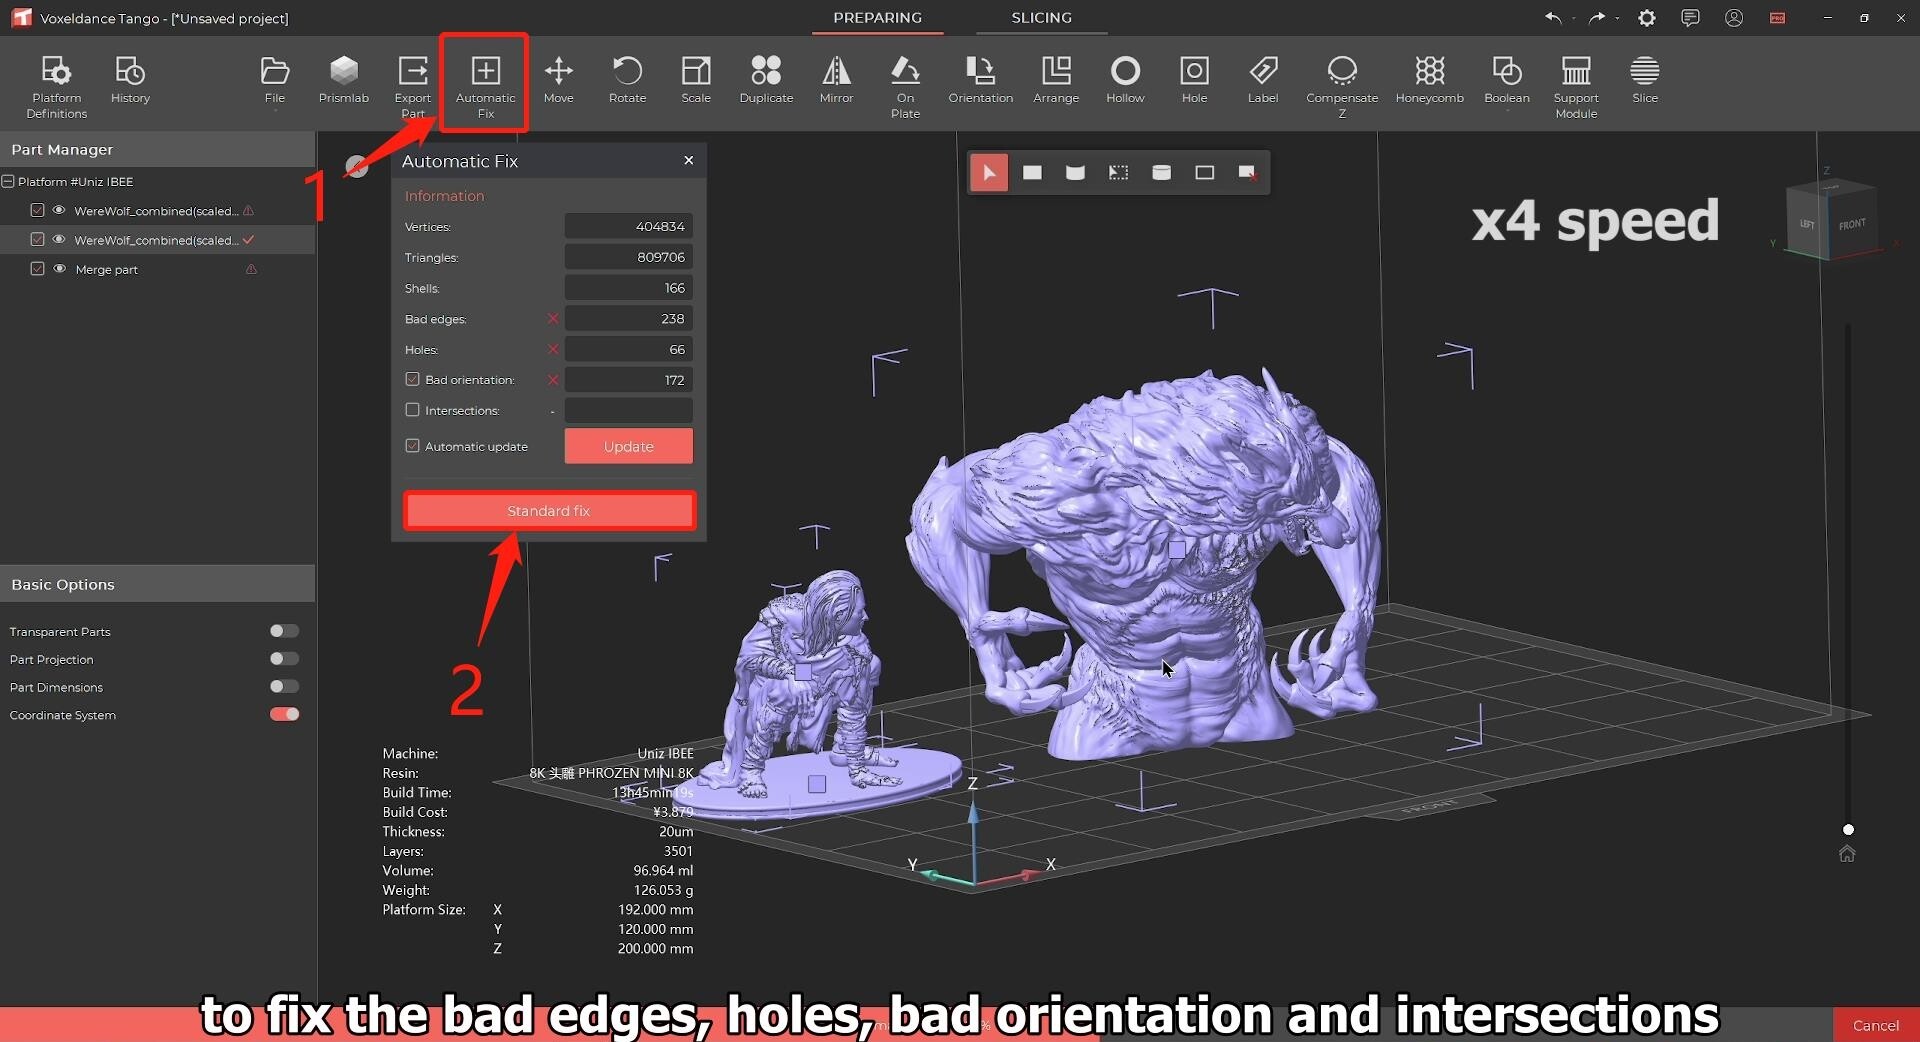
Repair
Choose all, click on "Automatic Fix", then choose Standard Fix to fix the bad
edges, holes, bad orientation and intersections.
Move
Choose the parts and move them to the desired locations. If you have many parts to print all
together, choose arrange to automatically order them.
Orientation
Choose all the parts, click on orientation, choose one optimize criteria and apply. You can
auto orientate the model multiple times to achieve the result you want.
To manually change model's orientation, drag the bounding box or choose rotate from the menu to do the editing.
3. Support and Hollow
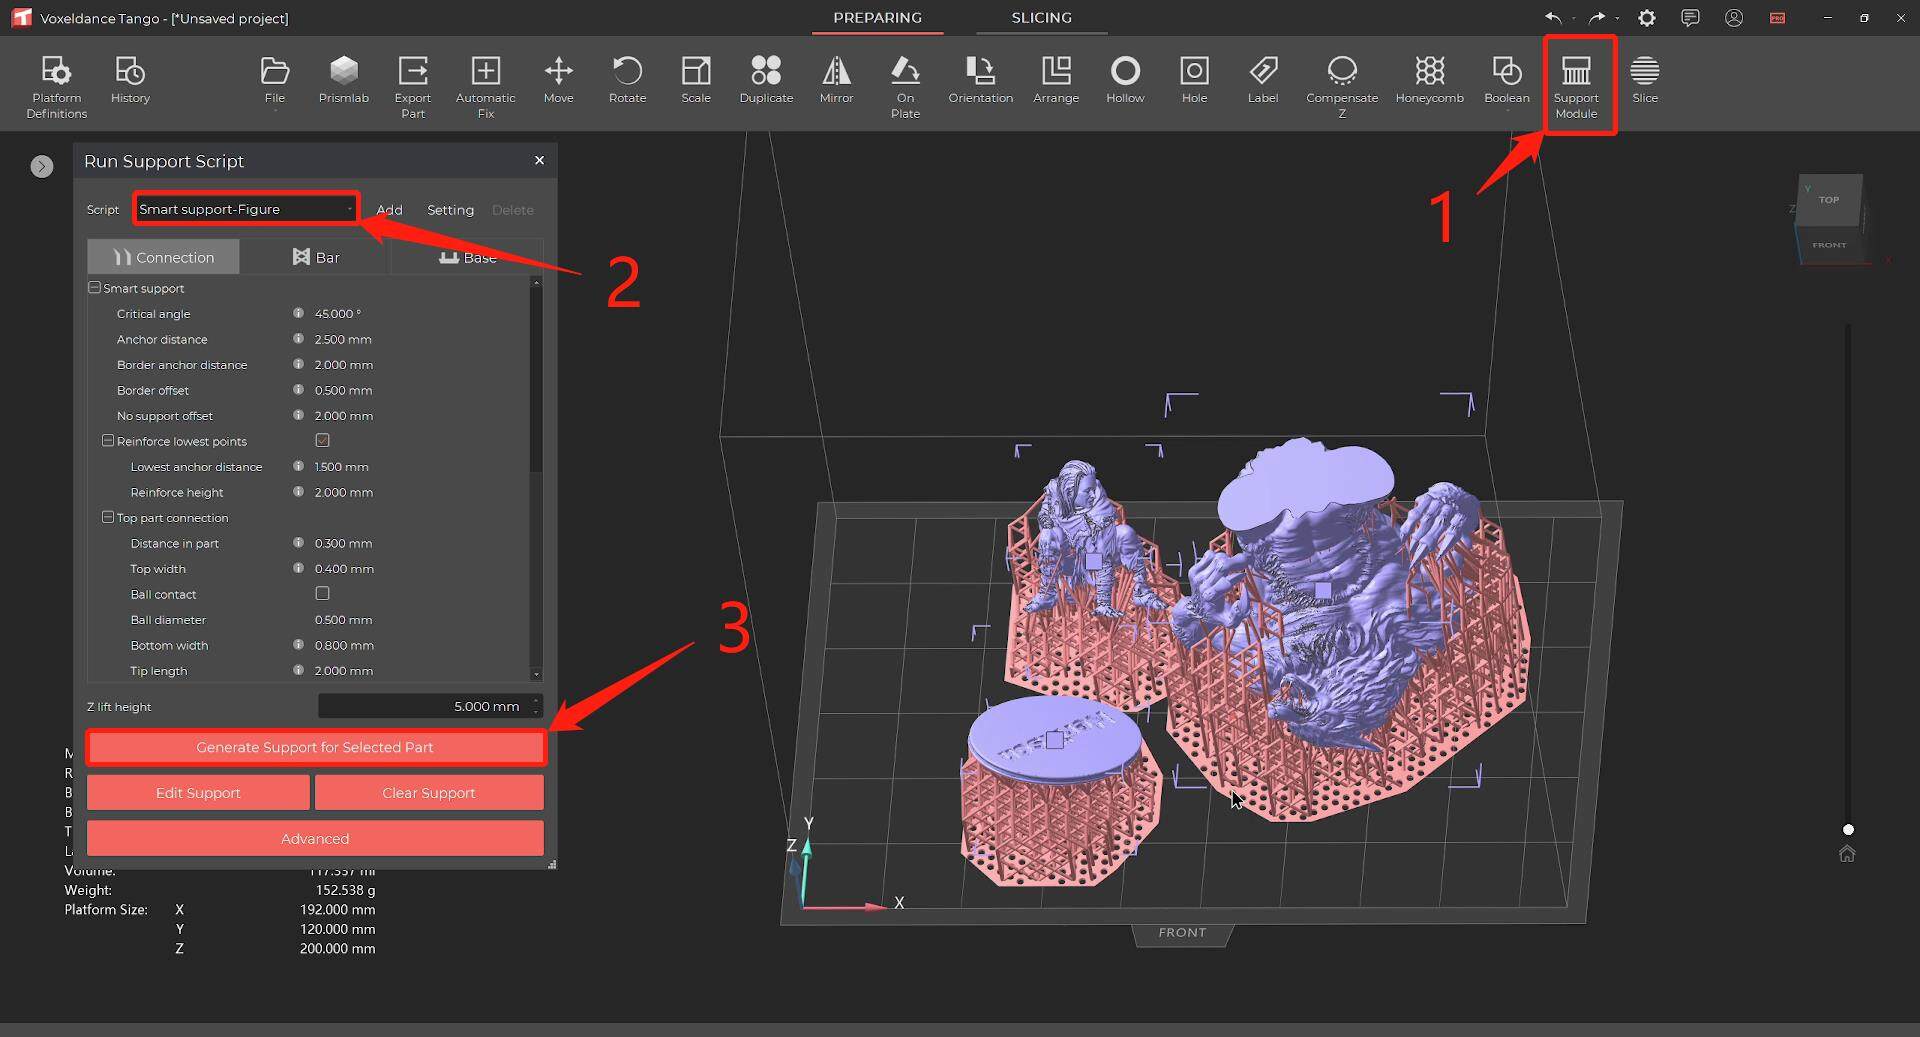
Automatic support generation
Select all parts, click on Support Module and choose the right type of script for support generation. Tango slicer already has built-in support scripts for figurines and war chess.
After choosing the script, click on "Generate support for Selected Part" and you'll have the support automatically generated for you.
Manual support editing
If you want to further edit the support, choose the part, click on "Edit support", to add or delete support touchpoints marked in blue. Click on Apply to update the support generation.
Hollow
Choose the parts you want to hollow, click on Hollow and apply. You can check the result in this way.
Add holes
Select Hole from the menu, click on the model to add holes. Hit on Ok to apply the changes.
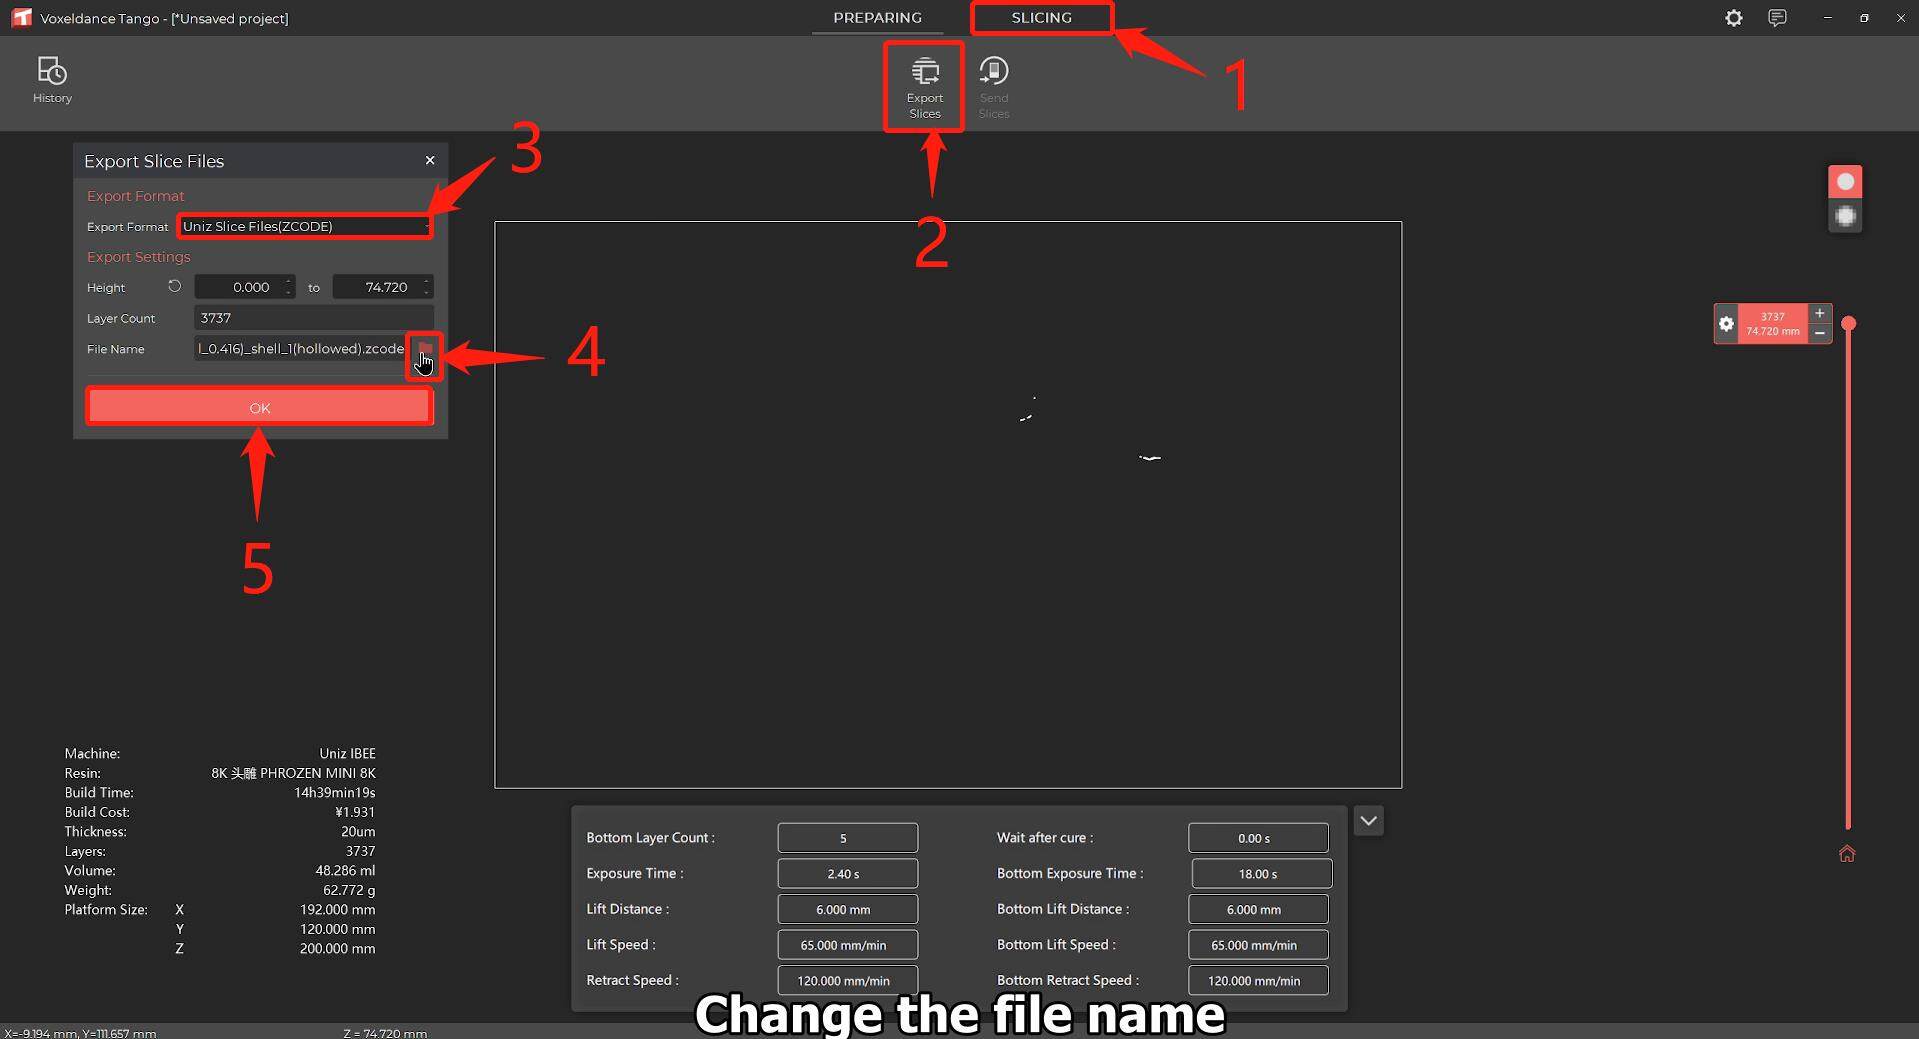
Slicing & export
Click on Slice, export slices. Change the file name, and click on ok. Wait for the slicing to finish, and you're ready to print.
Know more about Tango slicer: www.voxeldance.com/Tango


